Wavlink Extender Not Working? Experiencing problems with your Wavlink setup, such as difficulty connecting to Wavlink WiFi or login issues with the Wavlink router? If so, follow troubleshooting steps to address concerns related to the Wavlink extender not working or issues with wifi.wavlink.com or Wavlink Extender Not Working
AP Setup Wavlink – Can’t Connect to WiFi
If you can detect your WiFi signal but are unable to connect or facing issues with wifi.wavlink.com, there could be various reasons for the problem. Many of these issues are common and can be resolved easily, so there’s no need to worry when your Wavlink Extender Not Working issues arrises! In this article, we’ll walk through some troubleshooting steps:
Power Cycle the Extender:
- Turn off the extender and wait for 30 seconds.
- Turn on the extender and wait for it to complete the boot-up process.
- Attempt to connect again.
Examine the connection between your router and the extender.
- Ensure a stable and proper connection between the extender and your router.
These steps can help address connectivity issues with your extender.
If you can see a WiFi signal from your router but cannot connect to it, there are two likely causes:
- Ensure the extender is properly linked to the primary router, verifying the correctness and functionality of the connection.
- Confirm that the extender is associated with the same router as your computer or other devices; if multiple routers exists.
Connect Your Device Directly To Your Router With An Ethernet Cable
If you can establish a direct connection between your computer or phone and the router using an Ethernet cable, it suggests that the Wavlink Extender Not Working or malfunctioning. Consider testing with a different router instead of your current one.
If this still doesn’t work, make sure all of your devices are within range of the extender and that they are connected to the same network.
Change The Wireless Channel on Your WiFi Router
If your WiFi router is dual-band, try adjusting the wireless channel. The majority of routers have several channels available for signal broadcasting. Switch to a different channel if one is interfering with another.
This may be as easy as selecting a non-used wireless channel from a list of channels that neighboring networks are using on some routers. On others, you might have to choose a certain channel number by yourself (1 through 11).
To change the wireless channel on your WiFi router:
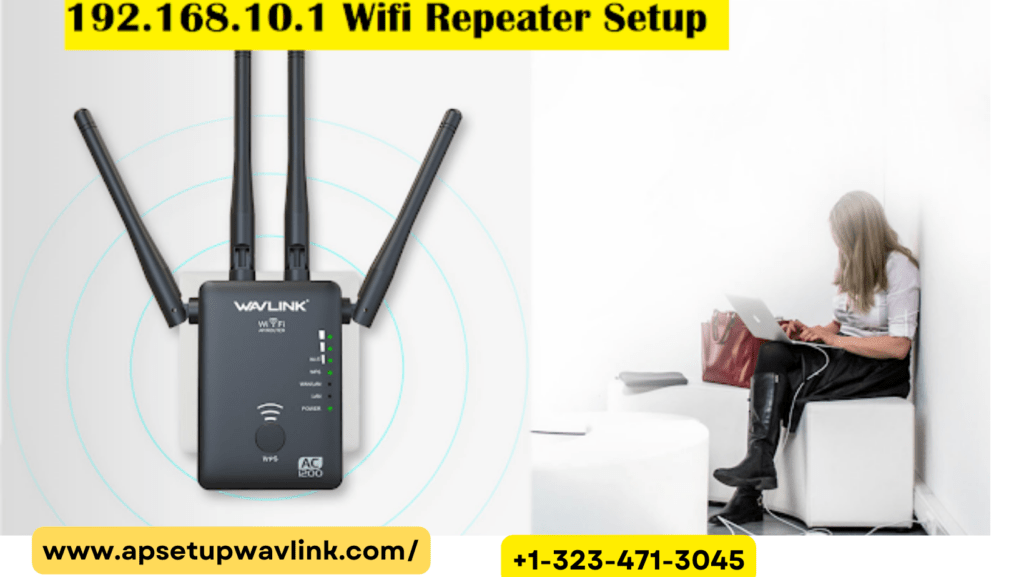
In the address bar of an open internet browser window, type 192.168.10.1 and hit Enter. This ought to take you straight to the configuration page of your router, where you can adjust things like the network name (SSID), password, and wireless encryption settings.
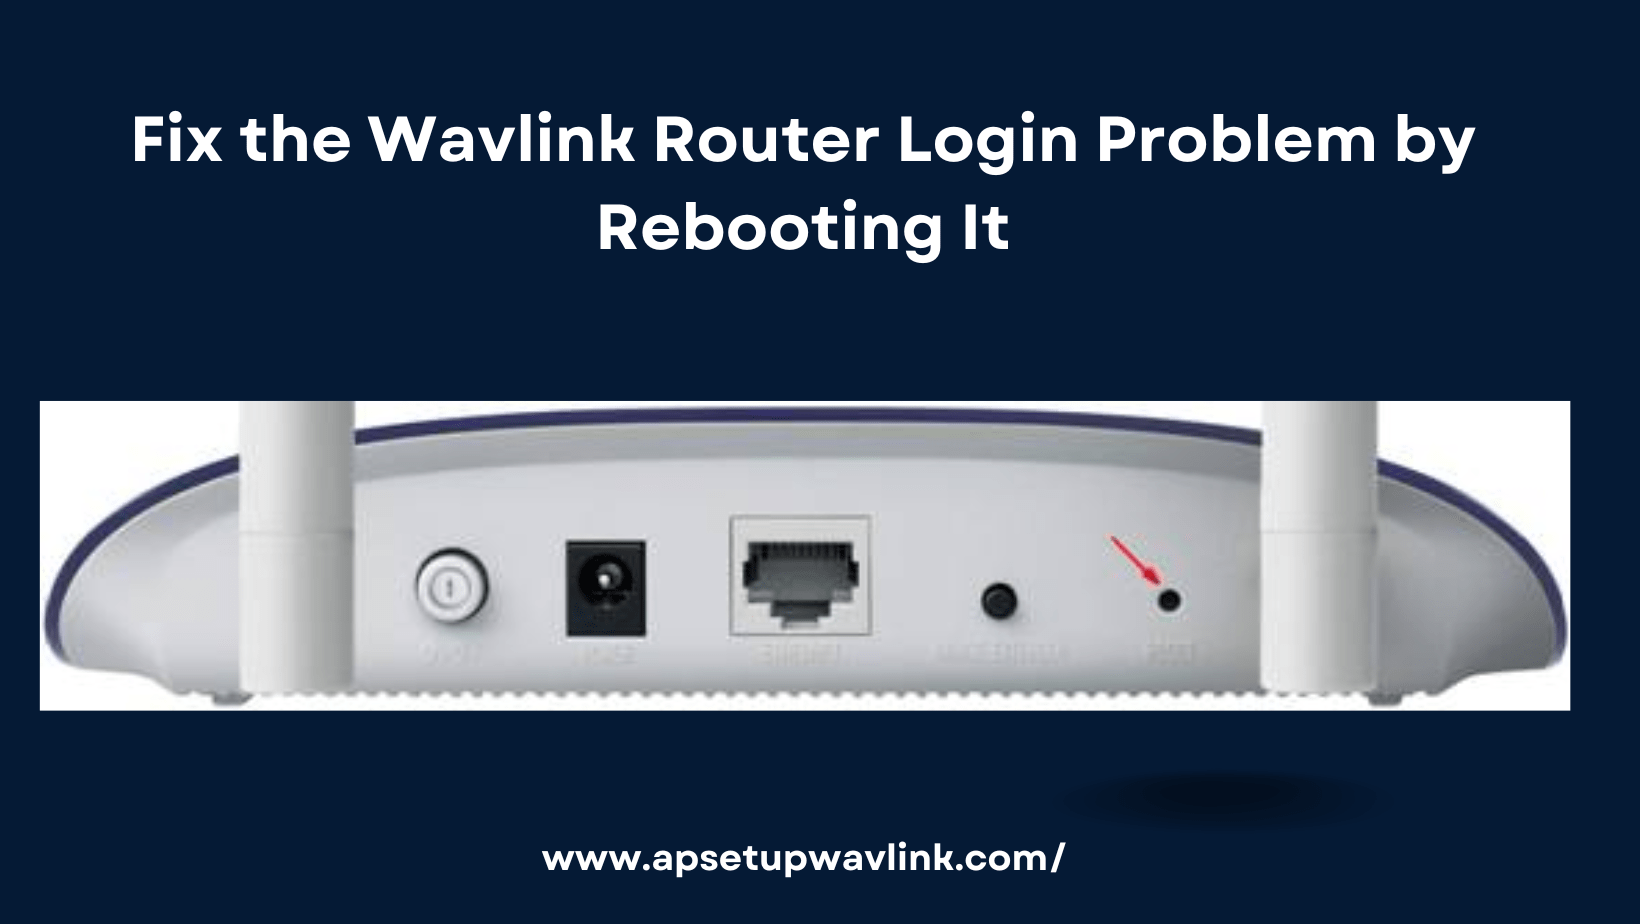
Fix the Wavlink Extender Not Working by Rebooting It
Try restarting your modem or router if you’re trying to connect to WiFi and you can see the signal but are still unable to connect.
Unplug the power source from your router or modem for a few seconds, then plug it back in. Prior to attempting another connection, wait for all of the lights on your modem or router to turn back on. If this doesn’t work, try following these steps:
- Check for Hidden WiFi Network:
- If you can view the WiFi network but face connection issues, it might be hidden.
- Unhide the Network:
- To connect to a hidden network, make it visible first.
- Navigate to your iPhone settings and choose “WiFi.”
- Tap the name of your WiFi network until it appears below in gray text (indicating it’s not connected).
192.168.10.1 – Fix Wavlink Extender Not Working
There are several causes behind the Wavlink Extender Not Working:
- Verify that there is a strong connection between your router and the extender.
- To accomplish this, see if any connected devices—like a printer or laptop—are present.
- Try using an Ethernet cable to connect one of the devices directly to your router if it’s the only one operating.
- Proceed to other alternatives if you are still unable to complete the Wavlink extender configuration
- Change your WiFi network’s channel to 12 or 13 if there are a lot of other nearby WiFi networks utilizing channels 1 through 11 so that their transmissions don’t conflict with one another and cause problems.
- If adjusting the channel does not solve the issue, restart your modem and WiFi router. Before replugging them.
- Use cable Ethernet rather than wireless if at all possible as it may increase speed and dependability. Make sure nothing has changed since the last reboot before trying it again (installing a new software update, for example).
- These are only a handful of the most typical reasons why wireless connectivity issues arise.
Fast Setup Procedures for Various Wavlink Extender Models
Wavlink provides a wide variety of WiFi extender models to satisfy consumers’ specific wireless connectivity requirements. For the most part, these extender models have similar and simple installation, login, and configuration methods.
But, you can run into some issues when setting up the Wavlink N300, Wavlink AC600, Wavlink AX1800, Wavlink AC2100, Wavlink AC750, and Wavlink AC1200. Here are some fast steps to finish the configuration for certain Wavlink extender models in order to prevent it.
- Turn on the Wavlink Extender by plugging it in.
- Link a Client Device to Setup_Ext Wavlink Extender
- Visit 192.168.10.1 or wifi.wavlink.com.
- Comply with the instructions displayed on the screen to finish setting up the Wavlink Extender models.
- Please do not hesitate to use our technical help if you run into any problems or mistakes when setting up these Wavlink Extender models.
Why Wavlink Extender Not Working?
Check this quickly: Is wifi.wavlink.com down or is your Wavlink extender not working? If so, you can try these troubleshooting steps.
What To Do If The Extender Is Unable To Connect To The Router?
There are several actions you can take to troubleshoot your extender if it isn’t working. Make sure your extender’s power LED is flickering orange by first checking it. Otherwise, ensure that:
Wavlink Extender Not Working: why
- When utilizing the default settings, your devices are linked to the wavlink_ext wireless network (SSID) of the extender, or something similar if you’ve modified it.
- Your extender is in range of you. “WiFi range” refers to the separation between devices and the points of connection that they have. This figure may differ significantly from your claims, depending on the type of gadget you’re using and the level of interference in your location.
- Additionally, confirm that there isn’t another WiFi router close by that might interfere with yours. If there is, consider moving it farther away from you and other people until they stop experiencing issues with their internet speed or connection!
Verify That Your Devices Are Within Your Extension’s Coverage
- Ascertaining whether you are inside range of your Wavlink wifi extender is the first and most fundamental step to take when it stops working.
- There is nothing the gadget can do for you if you’re not. See our post for information on the ideal distance between you and the extender, as well as the range you might anticipate depending on the kind of wireless devices you own.
- Make that the extension and its base router are receiving a strong signal.
- The first thing to look for if your extender arrangement isn’t working properly is if it’s connected and getting a strong signal from its base router.
To do this:
- Confirm that you are within the effective range of the base router for the Wavlink WiFi extender setup.
- Plug the Wavlink WiFi extender into an outlet near your home’s router or the desired coverage area.
- Adjust its placement until a strong signal from the base station is received, considering that higher speeds demand more power.
- If your home has multiple devices or utilizes bandwidth-intensive services like streaming, think about adding another access point/extender.
- Check for green lights on both devices, such as the “WiFi” indicator represented by three bars, to ensure they are connected.
Actions You Can Take Prior to Asking for Assistance from Support
- Check the power LED to ensure your Wavlink WiFi extender is powered on and connected to a functional power source.
- Use a Micro USB cable for charging, and ensure a USB power adaptor is plugged into a suitable outlet
- Confirm that all devices are connected to the same network as your Wavlink WiFi Extender.
- For Android devices, navigate to Settings > WiFi, tap the extender’s name, and connect by entering the password if required.
- For iPhone/iPad/iPod touch, access Settings > WiFi, choose “Wavlink” from available networks, enter the passcode or key, and press Join if prompted.
- If problems persist, contact our customer support team for assistance with Wavlink extender issues or wifi.wavlink.com concerns. They are ready to help!
Read More
- wavlink n300 setup
- Wavlink Powerline Setup
- Wavlink WiFi 6 Router Setup
- WL WN519n2 N300 Extender Setup
- WL-WN691AEF AC650 Extender Setup
- Wl WN566a2 AC750 Extender Setup
- Wl WN566a2 AC750 Extender Setup
- WL WN579G3 AC1200 Extender Setup
- WL WN583A6 AC2100 Extender Setup
- Wavlink wifi4 extender setup
- WL WN575A4 AC1200 Extender Setup
- WL WN575A4 AC1200 Extender Setup
- WL WN583AX1 AX1800 Extender Setup