The Wavlink powerline setup functions as a WiFi extender kit designed to enhance the performance of your existing router. Whether in a spacious home or a multi-story office, it effectively extends router signals to every corner. To make the most of this service, it’s crucial to understand its configuration and other essential aspects. Familiarize yourself with these points for optimal use.
Wavlink Powerline Setup Overview And Working
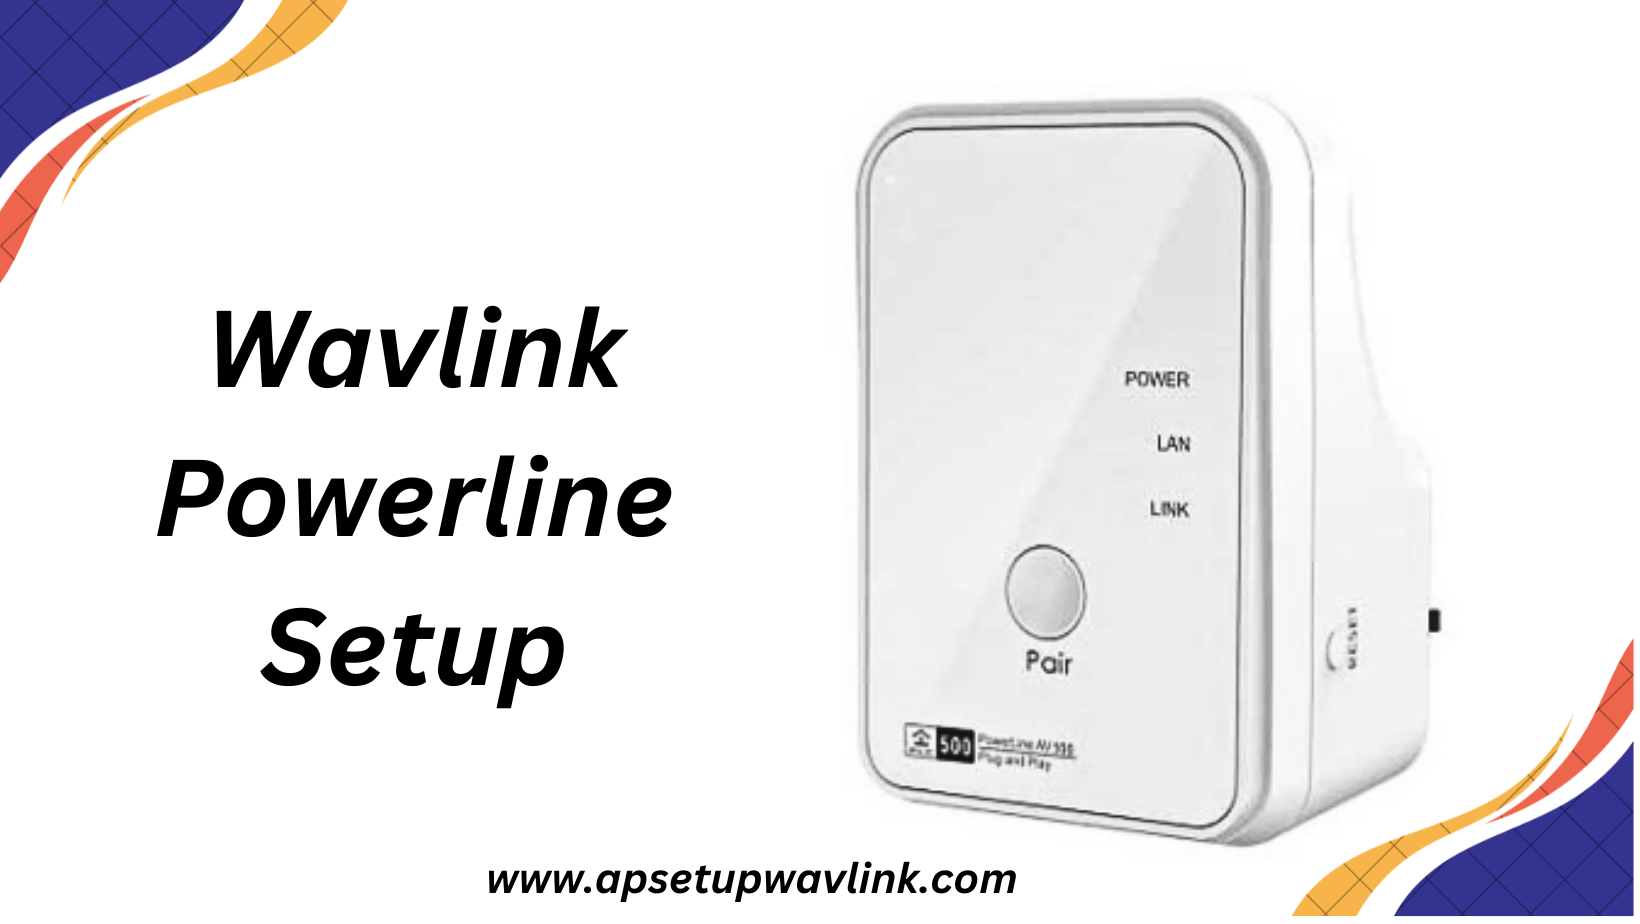
In terms of the Powerline setup overview, the back panel hosts power plugs, while the front panel features a Pair button and a reset button. Additionally, various LEDs indicate Power, LAN, Link, and WiFi statuses.
Lastly, an Ethernet wire port is included. This compact device operates on Home Plug AV and IEEE 802.3 technologies, employing WPA2-PSK encryption. The configuration process is simplified by the Pair button on the front panel, and stable internet signals are achieved through wired connections using cable ports.
Configuration Through Powerline Pair Button
Since the Wavlink powerline setup includes a Pair connection feature, you can quickly configure it. Use the advice listed below to accomplish this.
- First things first, insert the powerline devices into the outlets.
- Proceed to the next step once the LED turns on and these become connectable.
- Connect the power cable to both devices now.
- Using the ethernet wires, connect the first powerline to the router and the second to your device.
- The first powerline device’s circular Pair button should then be pressed.
- Press the Pair button on the other powerline after a few seconds.
- Ultimately, following a successful connection process, the color of the light on both devices will change.
Use your linked device to effortlessly take advantage of the fastest internet speed wherever you desire.
Wavlink powerline setup Instructions For Setup
Apart from that method, you can configure it using any web browser on the device connected to the network. To complete the process using this method, access and visit the web-based setup portal.
- The LEDs will change to the perfect colors once the power lines are connected to the router and your device.
- Open any web browser on your device after that—it must be the most recent version.
- Next, enter the default IP or web address of the wavlink in the search panel.
- Enter 192.168.10.1 as the IP address and apsetup as the web address.
- The sign-in page will then show up on the device’s screen.
- Enter your login information in the required field on the following page, then click OK or Log in.
- After that, simply follow the on-screen directions and enter the necessary information to finish the process quickly.
Therefore, you can install and use the Wavlink powerline setup correctly by using either of these two methods.
Wavlink powerline setup Features
The Wavlink powerline setup offers a range of advanced features for seamless connectivity. With high-speed data transfer, simple plug-and-play setup, and WPS functionality, it ensures effortless and secure device pairing.
- High-Speed Connectivity: Facilitates fast data transfer and reliable connectivity throughout your home or office.
- Plug-and-Play Setup: Easy installation with a simple plug-in process, requiring no technical expertise.
- WPS for Effortless Pairing: WPS (Wi-Fi Protected Setup) functionality for seamless and secure device pairing.
- LED Indicators: Clear LED indicators for power, connectivity, and signal strength status.
- Ethernet Ports: Equipped with Ethernet ports for stable wired connections to devices like routers and computers.
- Compact Design: Sleek and compact design for unobtrusive placement in any environment.
- HomePlug AV Technology: Utilizes HomePlug AV technology for efficient powerline communication.
- IEEE 802.3 Compliance: Complies with IEEE 802.3 standards for enhanced reliability and compatibility.
- WPA2-PSK Encryption: Ensures secure data transmission with WPA2-PSK encryption.
- Firmware Update Capability: Allows firmware updates to enhance performance and introduce new features.
- Factory Reset Option: Includes a factory reset option for troubleshooting or reconfiguration.
- Stable Internet Signals: Provides stable internet signals through wired connections for consistent performance.
- Extended Wi-Fi Range: Effectively extends Wi-Fi coverage to eliminate dead zones in your network.
Wavlink Powerline Setup via WPS
Wavlink powerline setup through WPS (Wi-Fi Protected Setup) is a quick and straightforward process. Here’s it:
- Insert Wavlink Powerline devices into electrical outlets.
- Allow the WPS LED to indicate readiness.
- Press the WPS button on the first Powerline device.
- Press the WPS button on the second device within two minutes.
- Confirm successful WPS setup when the LED on both devices indicates a stable connection.
- For best results, place Powerline devices in areas with optimal signal strength.
- Confirm the extended Wi-Fi network is available for use.
Wavlink Powerline Factory Reset
Performing a factory reset on your Wavlink Powerline is a straightforward process to restore the device to its default settings. Here’s it:
- Find the reset button on the Wavlink Powerline device.
- Hold down the reset button with a paperclip or other comparable instrument for approximately ten seconds
- Release the reset button, resetting the device to factory settings.
- After the factory reset, reconfigure the device as required for your network.
If you continue to have problems setting up your Wavlink extension, give Wavlink support a call at +1-323-471-3045.
Wavlink Powerline Firmware Update
Keeping your Wavlink Powerline up-to-date is crucial for optimal performance. To update the firmware, access the device’s web interface using a web browser. Follow the given steps:
- Log in to the web interface of your Wavlink Powerline device using a web browser.
- Locate the current firmware version in the device settings.
- Go to the Wavlink website to check for the latest firmware version.
- Download the latest firmware version.
- Within the web interface, upload the downloaded firmware file to the Powerline device.
- Start the firmware update process and wait for it to complete.
- Confirm the success of the update by checking the firmware version in the device settings.
- Follow any on-screen instructions to reboot the Powerline device if required.
- Experience improved performance and new features with the updated firmware.
Troubleshoot The Powerline Setup Errors
As the Wavlink powerline setup appears to be a pair-to-use device, try these troubleshooting steps if the powerline AV500 pairing fails.
- To find the source of the problem, first confirm that the devices’ LEDs are working.
- Check the wired connections and make sure these wires must not have any signs of tear or wear.
- Also, check the electrical power sockets and the power lines must get the proper supply from them.
- Thereafter, unplug the wavlink powerline setup and plug them in again after some time to cool down the overheating.
- Additionally, see what version of the web browser is on the connected device and update it if a new version is available.
After trying those above-mentioned steps, the Wavlink powerline setup still keeps malfunctioning. Then, choose the reset function to eliminate the error.
- First, unplug your gadget from the Wavlink device.
- Afterwards, give the powerline’s reset button a brief press.
- The powerline’s LED will turn on once the factory reset is finished.
- Reconfigure the device and connect your device to it after it has been reset.
Common setup
- Wavlink N300 Setup
- WL WN583AX1 AX1800 Extender Setup
- WL WN575A2 AC750 Extender Setup
- WL WN576A2 AC750 Extender Setup
- WL WN578B2 AC750 Extender Setup
- WL WN575A3 AC1200 Extender Setup
- WL WN577A2 AC750 Extender Setup
If you continue to have problems setting up your Wavlink extension, give Wavlink support a call at +1-323-471-3045.