Wavlink WL WN579G3 AC1200 extender setup may seem daunting for first-time users, but the inclusion of the WPS feature makes configuration straightforward, offering several attractive benefits. To simplify the process and optimize device usage, follow the provided instructions.
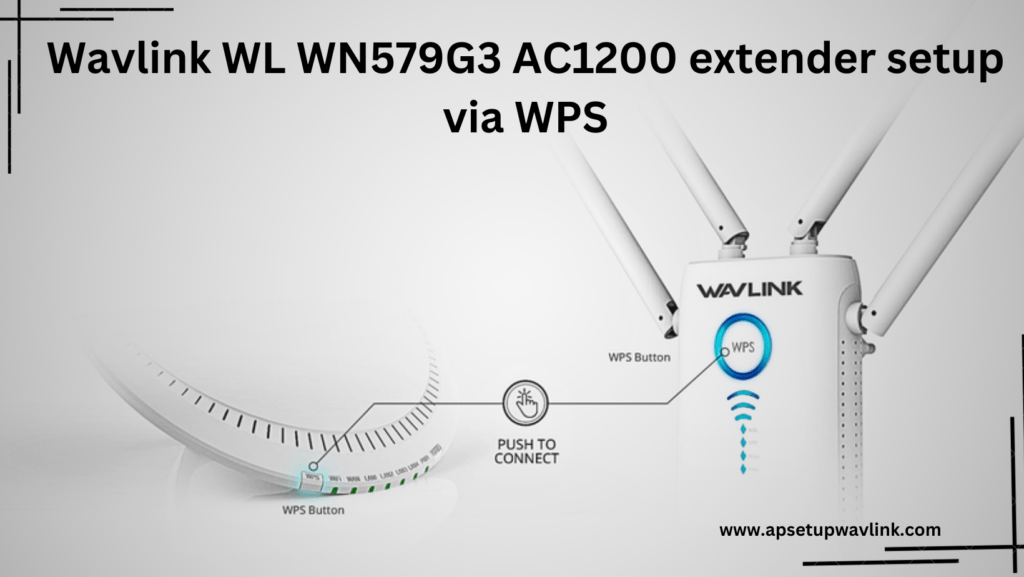
Wavlink WL WN579G3 AC1200 extender setup via WPS
Use the WL WN579G3 AC1200 extender’s WPS feature to conveniently complete the Wavlink WL WN579G3 AC1200 extender setup process.
- Connect the extender to the power source while considering the range limit.
- Ensure the extender is positioned near the router for a strong signal.
- Initially, press and hold the extender’s WPS button for a few seconds.
- Wait for the extender to boot up and enter a discoverable state.
- Press the WPS button on the router to initiate the connection to the extender.
- Allow both devices some time, monitoring their LEDs.
- After a while, the extender and router should be successfully connected.
- Proceed to the next step, which involves connecting your device to the network.
Wavlink WL WN579G3 AC1200 extender setup Manually
It is possible to perform Wavlink WL WN579G3 AC1200 extender setup the extender manually using a web-based setup method in addition to the WPS process.
- Connect the extender, router, and device to establish a network.
- For a wireless connection, connect the device to the extender network.
- Alternatively, for a wired connection, use an ethernet cable.
- Insert the cable ends into the extender and router or device’s ethernet ports.
- Open any updated web browser on the connected device.
- In the browser’s search bar, enter the extender’s default web or IP address.
- The web address is wifi.wavlink.com, and the IP is 192.168.10.1
- The browser will redirect to the extender’s login page.
- Use the extender login credentials
- Click the Sign-In option, and the setup page will appear on the screen.
- Choose the network from the settings or create a new strong SSID as needed.
Thus, the Wavlink WL WN579G3 AC1200 extender setup is configured now through a web-based method.
Wavlink WL WN579G3 AC1200 extender Setup via app
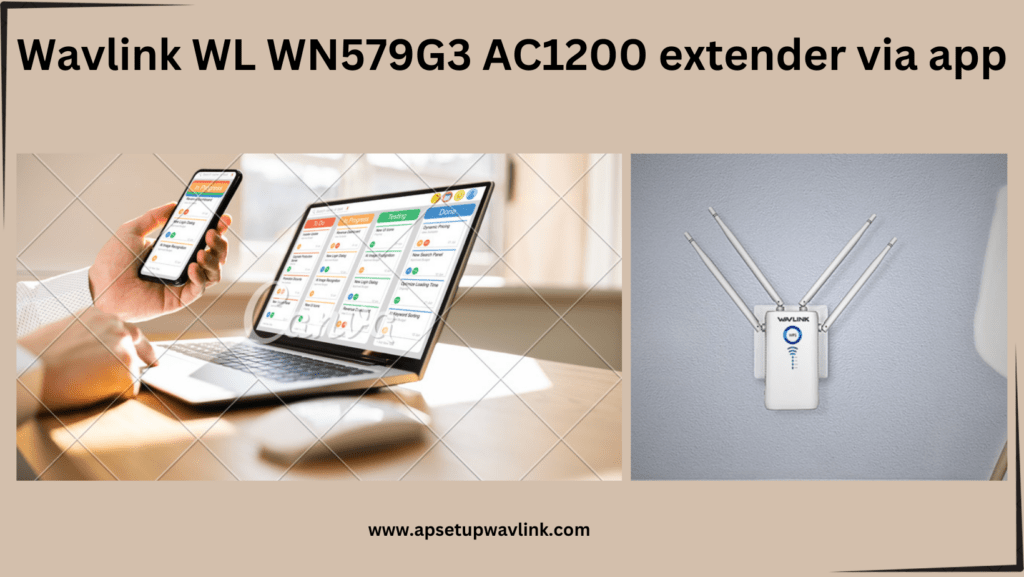
For Wavlink WL WN579G3 AC1200 extender setup using an app, follow these steps:
- Go to your app store on your phone.
- Find the official Wavlink extender setup app.
- Download and install the app.
- Plug in your Wavlink WL WN579G3 AC1200 extender and make sure it’s on.
- On your phone, go to Wi-Fi settings.
- Connect to the Wi-Fi from your extender.
- Open the Wavlink extender setup app.
- Follow the steps on the screen to set up your extender.
- Connect your extender to your usual Wi-Fi by entering the details in the app.
- Put your extender where the app suggests for the best signal.
- Once you finish setting up, save and close the app.
- Check your device’s Wi-Fi to make sure it’s connected to the new extended network.
By using theWavlink WL WN579G3 AC1200 extender setup via app, you can simplify the installation process and enjoy an extended and improved Wi-Fi network.
Fixing Hints For Wavlink WL WN579G3 AC1200 extender Setup Issues
In any event, use these fixes to get rid of any errors the extender may have been displaying while extending the signals.
Restart The Extender
Follow these steps to troubleshoot and improve the extender’s performance:
- Unplug both the extender and the router from the power sockets.
- Allow them to rest and check for signs of overheating.
- Continuous usage can lead to overheating in devices.
- After a brief period, plug them back in and reconnect your devices to the network.
- Finally, observe the extender’s performance, which should improve after this process.
Update The Software
Address potential errors in the extender’s operation caused by outdated firmware with the following steps:
- Check the current firmware version of the extender on your PC.
- Verify the latest available firmware version for the extender.
- Download the official firmware file and save it to your computer.
- Access the web-based setup page and upload the downloaded firmware file.
- Complete the firmware update process to ensure the extender is running on the latest software version.
Reset WL WN579G3 AC1200
For a foolproof solution to eliminate issues, consider resetting the extender with these steps:
- Locate the reset button on the extender.
- Press the reset button, using a paperclip if necessary.
- The extender’s LED will start blinking and stabilize after some time.
- Once the LED becomes constant, reconfigure the extender.
- This process will discard the previously configured settings, providing a fresh start.
Make Network Secure
During the extender configuration, whether opting for any of the available methods, ensure to:
- Generate a robust password for the network.
- Create a unique SSID for improved network identification.
- Make adjustments in the extender’s advanced settings to enhance performance.
- Click the “Save” option to apply and implement the changes made to the extender.
Update firmware on your Wavlink WL WN579G3 AC1200 extender
To update the firmware on your Wavlink WL WN579G3 AC1200 extender, follow these steps:
- Log in to the extender’s web-based setup page. You can do this by entering the extender’s IP address into a web browser.
- Visit the official Wavlink website or check the user manual for your extender model to find the latest firmware version.
- Download the latest firmware file to your computer.
- Enter the extender’s IP address ie 192.168.10.1
- Log in to the extender’s web-based setup page using your credentials.
- Look for the firmware upgrade or update section within the extender’s settings.
- Upload the downloaded firmware file to the extender through the web interface.
- Follow the on-screen instructions
- Allow the extender some time to complete the firmware update process. Do not interrupt the process.
- If prompted, reboot the extender to apply the firmware changes.
- Log in again to the extender’s web interface and check the firmware version to confirm that it has been successfully updated.
Keeping your extender’s firmware up-to-date ensures that you have the latest features, security patches, and performance improvements. Always refer to the specific user manual for your extender model for detailed instructions tailored to your device.
Factory reset on your Wavlink WL WN579G3 AC1200 extender
To perform a factory reset on your Wavlink WL WN579G3 AC1200 extender, follow these steps:
- Find the reset button on the extender.
- Ensure the extender is powered on.
- With the extender powered on, use a paperclip or a pin to press and hold the reset button.
- Hold the reset button for approximately 10-15 seconds. Keep holding until you see the LEDs on the extender respond, indicating the reset process is initiated.
- After holding for the required duration, release the reset button.
- Allow the extender a few minutes to complete the factory reset. The LEDs may blink or change during this process.
- Power off the extender and then power it back on.
- Once the extender has restarted, you will need to reconfigure it from scratch. Use the default login credentials and follow the setup process outlined in the user manual.
Performing a factory reset restores the extender to its original settings, erasing any customized configurations. Ensure you have the necessary information for reconfiguration, and consult the user manual for specific instructions related to your extender model.
Common Wavlink Extender Setups
- Wavlink WiFi 6 Router Setup
- Wavlink WiFi5 extender Setup
- wavlink n300 setup
- WL WN583AX1 AX1800 Extender Setup
- Wavlink wifi4 extender setup
- WL WN583A6 AC2100 Extender Setup
Some Issues You Might Face while Wavlink WL WN579G3 AC1200 extender setup
Here are some issues that you might face while Wavlink WL WN579G3 AC1200 extender setup:
- Wavlink Login Issues
- Wifi.wavlink.com Not accessible
- Wifi Repeater/Extender Not Working
- Ethernet Extender Not Working:
- Wifi Extender Password Not Working
- Wavlink Router Not Working
- Verify proper power and connectivity
- Extender keeps disconnecting
- Can’t Connect to IP
- Fix Wavlink Yellow Light Issue
- Fix Wavlink Red Light Issue
Troubleshoot tips while Wavlink WL WN579G3 AC1200 extender setup
Enhance your wireless network with the Wavlink WL WN579G3 AC1200 extender setup. Effortlessly amplify your Wi-Fi signals, eliminate dead spots, and enjoy seamless connectivity. Simple installation and advanced features ensure optimal performance. Stay connected and experience a new level of wireless convenience with the WL WN579G3 AC1200 Extender.
- Reboot the router.
- Ensure proper placement for optimal signal strength.
- Check for firmware updates.
- Verify cable connections.
- Test with different Ethernet cables.
- Check for ISP issues.
- Confirm correct password
- Reset password if needed.
- Check cable connections and power supply.
- Ensure proper placement and signal strength.
- Verify extender settings and firmware.
- Check for hardware issues.
- Ensure correct IP address entry.
- Check internet connection; try accessing from another device.
- Ensure correct login credentials; reset password if needed.
- Clear browser cache and try a different browser.
Always refer to the specific device’s user manual for detailed troubleshooting steps and contact Wavlink support if issues persist.