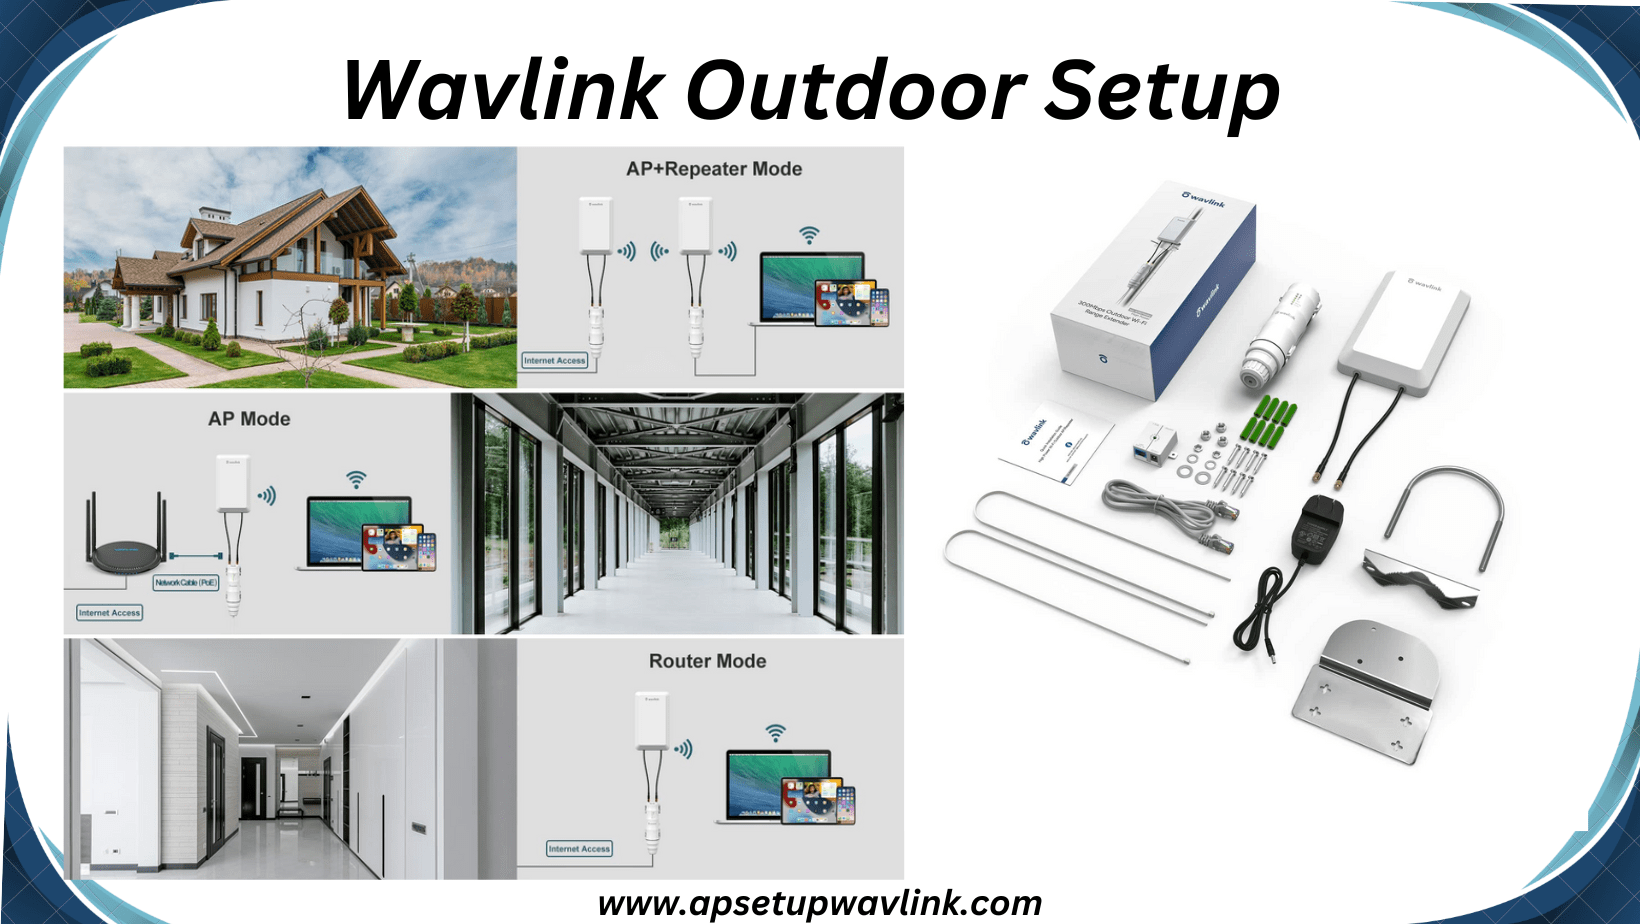
The Wavlink Outdoor Setup proves to be a dependable solution for extending your wireless network over long distances, be it in a business setting or a spacious home. Equipped with external antennas and a POE converter, this device delivers an impressive internet speed of up to 1200Mbps. Setting up and configuring the outdoor setup is a straightforward process, requiring only a grasp of its fundamental details. Explore more information about this product here to optimize your connectivity
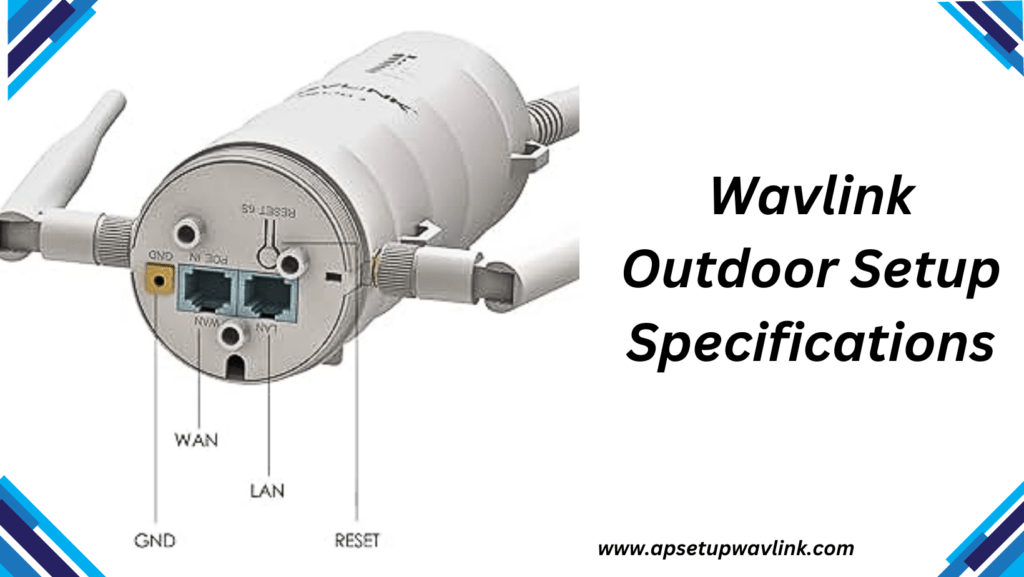
Wavlink Outdoor Setup Specifications
The various models of the Wavlink Outdoor Setup are compatible with IEEE 802.11 a-b-g-n-ac standards, offering support for dual frequency bands—2.4GHz and 5GHz. The inclusion of a Power Over Ethernet (POE) converter ensures the seamless transmission of internet signals without any hindrances. Additionally, built-in amplifiers, including power amplifiers and low-noise amplifiers, actively contribute to enhancing both signal power and signal strength.
WL WN572HP3 AC1200 Wavlink Outdoor Setup
Upon acquiring the WL WN572HP3 AC1200 outdoor Access Point, correctly attach the antennas to it. Proceed to affix the wall cover to the device, securing the AP outdoor onto any wall. Ensure a secure setup by tightly wrapping the device components using cable ties. Next, insert one end of the ethernet wire into the outdoor ethernet port located on the bottom panel and connect the other end to the POE port. Subsequently, insert the power cable into the POE power port and plug the adapter into a power socket
WN572HP3 Wavlink Outdoor Setup
Verify the outdoor AP’s power LED indicator after connecting it correctly. Take your device when the outdoor light reaches its peak brightness.
- Start by connecting your device to the Outdoor network.
- Open the network list on your device and select the appropriate network.
- Enter the network password in the provided field and click the connect option.
- Once the connection is established, launch any web browser.
- Enter the Outdoor default web or IP address in the browser’s search tab.
- Fill in either wifi.wavlink.com or 192.168.10.1 and click the enter button.
- Consequently, the login portal of the Outdoor will appear on the screen.
- Enter the login credentials, such as “admin,” in the username and password fields.
- Click “Sign-In” and proceed to perform basic settings on the screen page.
- Upon completion, the network will be extended, and your device will be successfully connected
Troubleshooting Tips For Wavlink Outdoor Setup
If the connected device experiences disconnection issues from the Wavlink Outdoor Setup for any reason, implement the following solutions:
- Begin by inspecting the operation of the Outdoor LEDs and notifications.
- Ensure that the AP outdoor is securely and properly connected.
- If not, carefully unwrap it and reattach it appropriately.
- Thoroughly check the cables used, as the AP outdoor relies entirely on wired connections.
- Disconnect any devices currently linked to the outdoor network.
- Reconnect your device to the network by accessing the web portal.
Attempt to connect using a different device this time, ensuring the use of the correct web or IP address and accurate login credentials. Additionally, consider updating the web browser on the connected device for improved performance.
Reset The Wavlink AP Outdoor
Another solution to get the Outdoor in its working state is to reset it and configure it again. Press the outdoor reset button which will be mainly located at its bottom. The LED will start blinking now and will turn solid once it completes the process. After that, reconfigure the Wavlink Outdoor AP setup and connect more devices to the network as it will start working efficiently now.
As a result, setting up the Outdoor AP in this way will be simple. Please get in touch with us if it disconnects again in any scenario. Send your product inquiries to +1-323-471-3045 to receive the necessary responses
Common Wavlink Extender Setups
- Wl WN566a2 AC750 Extender Setup
- Wl WN566a2 AC750 Extender Setup
- WL WN579G3 AC1200 Extender Setup
- WL WN583A6 AC2100 Extender Setup
- Wavlink wifi4 extender setup
- WL WN575A4 AC1200 Extender Setup
- WL WN575A4 AC1200 Extender Setup
- WL WN583AX1 AX1800 Extender Setup
Some Issues You Might Face while Wavlink Outdoor Setup
- Wavlink Login Issues
- Wifi.wavlink.com Unavailable
- Troubleshooting: Wifi Repeater Not Functioning
- Resolving Problems with a Non-Functional Wifi Extender
- Ethernet Extender Malfunction – Troubleshooting Steps
- Wifi Extender Password Not Working
- Wavlink Router Issues
- Unable to Connect to IP
- Resolving the Wavlink Yellow Light Problem
- Fixing the Wavlink Red Light Issue
FAQ