Wavlink wifi extender setup is the greatest savior when it comes to internet-related concerns. It is always effective in eliminating dead zones in your home. The Wavlink wifi extender setup is the nicest part about using an AP. Configure your network to provide for faster, safer, and more reliable internet access. Wavlink extenders work with all of your gadgets. Wavlink works with any device, including smartphones, smart TVs, and even Roku. We’ll go over the steps you’ll need to take to set up your Wavlink booster in this article.
Here are the steps for Wavlink wifi extender setup:
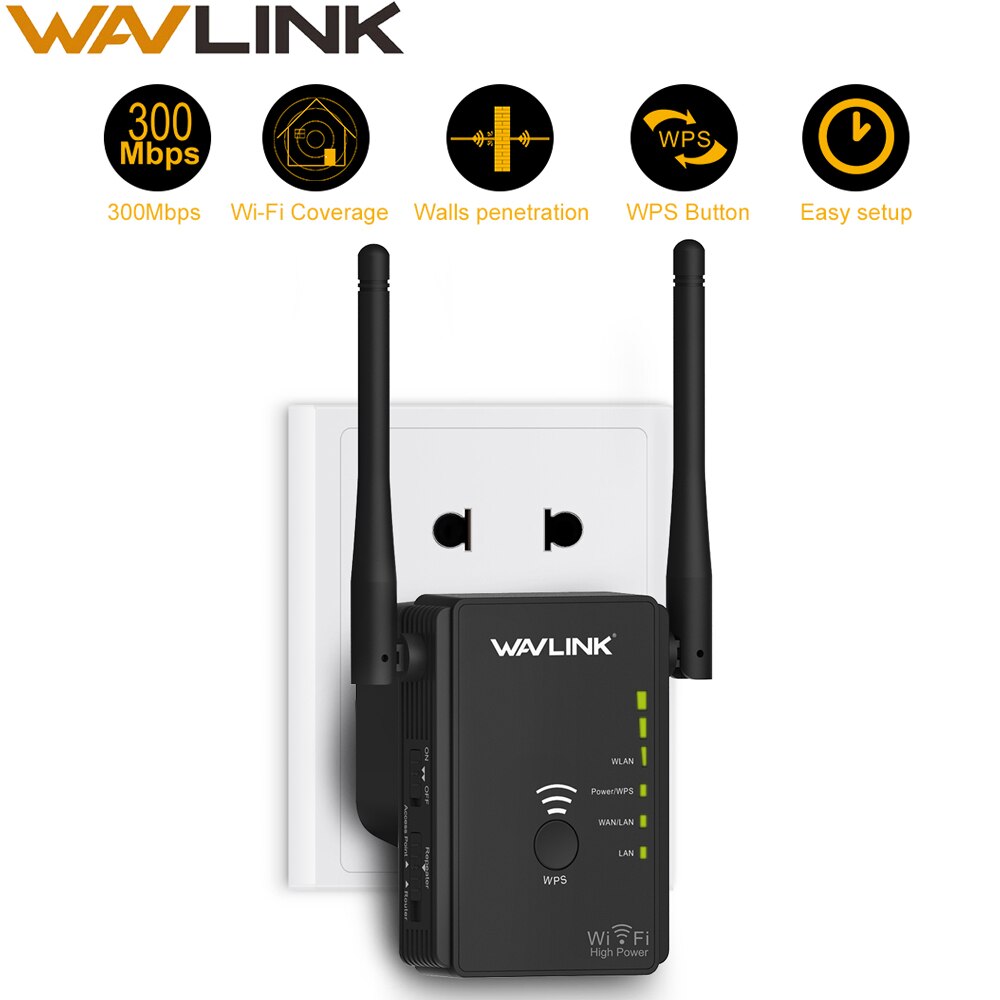
- Turn on your wavlink extender after unboxing it.
- Wait for the power LED to turn solid green after pressing the power button.
- Remember to keep the booster close to the router.
- Connect using Ap extender setup ext.
- Launch any web browser and type Ap.setup, then press the enter key.
- To log in, enter your personal information.
- Follow the steps to complete the installation.
- You can now unhook your repeater and relocate it to your new location.
That’s how you manually setup your wavlink extender. If you have any problems with the manual setup, let’s try the (WPS) setup.
Wavlink wifi extender setup using WPS
Let’s have a look at another approach for establishing your Wavlink repeater, the WPS method, which is said to be the quickest and easiest. After completing the Wavlink wifi extender setup through WPS technique, you will be able to set up your extender in less than two minutes without providing a username, password, or SSID. Let us now examine how the WPS technique works.
Here are the procedures for configuring a Wavlink extender using the WPS method:
- Activate your Wavlink extender.
- Make certain that it is close to the home router.
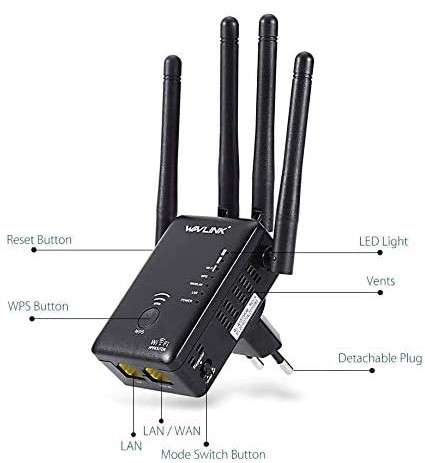
- On your booster, press the WPS button.
- Now, on your existing home router, press the same WPS button.
- When it displays three steady green lights, it implies you have successfully configured your repeater.
- You can unhook the repeater and place it wherever you choose.
That’s how you set up a wavlink extender using the WPS approach.
How to update firmware on your Wavlink extender?
You will need to upgrade the firmware on your Wavlink extender in order to remedy any issues that you may have while using it (whether it is not providing the desired speed or something else). It has additional security features as well as other new features that will help you resolve your concerns.
Follow the steps below to update the firmware on your Wavlink extender:
- Start your Wavlink extender.
- Consider any mobile device.
- Navigate to Ap.setup or 192.168.10.1.
- Select settings and then firmware upgrade.
- Follow the steps to complete the firmware upgrade operation.
- It will take a minute, so don’t unplug the booster in the meantime.
This is how to update the firmware on your Wavlink extender.
How to reset a Wavlink extender?
If you have forgotten your admin password or login and wish to recover it, you must do a factory reset on your booster. When you reset the Wavlink extender, it prepares it for a new setup procedure by removing all of your personal information such as passwords, usernames, and SSIDs. To finish the factory reset process, a hard pointed device, such as a paper clip or a needle, is necessary.
To reset the Wavlink wifi extender, follow the procedures below:
- Connect your Wavlink wifi repeater to a power outlet.
- Under a little hole, look for the factory reset button.
- It might be found on the repeater’s side panel.
- Push the reset button with a paperclip for 8-10 seconds.
- It will reboot automatically in a few seconds.
- Your repeater is now prepared for the new installation procedure.
If you still require assistance with your Wavlink extender, please contact us via our toll-free hotline or live chat. We are always here to assist you in any problem.
Also Read
- Wavlink AC600 setup
- PixLink WiFi Repeater Setup
- Macard WiFi Repeater Setup
- Trifiboost wifi extender setup
- Setek wifi extender setup
- Joowin wifi extender setup
- Generic wifi extender Setup
Frequenty Asked Question