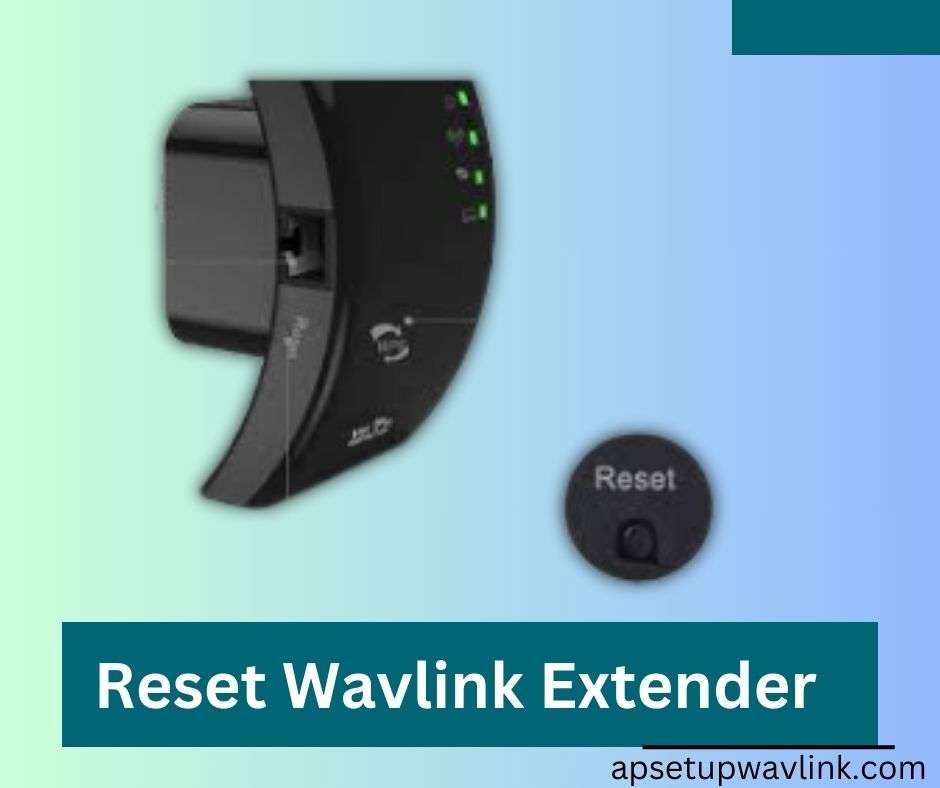
To Reset Wavlink Extender, locate the reset button, usually situated on the device’s bottom or side. Utilise a paperclip to press and hold the reset button for approximately 10 seconds until the LED indicators flash. This action reinstates the extender to its default settings, erasing any personalised configurations. Post-reset, reconnect to the extender’s default Wi-Fi network and access the setup interface via a web browser. Reconfigure settings to suit preferences, ensuring optimal performance. This reset process resolves issues and provides a clean slate for the Wavlink Extender, promoting seamless connectivity and troubleshooting.
Why they Need to Reset Wavlink Extender
Reset Wavlink Extender may be necessary for various reasons. It can help troubleshoot and resolve connectivity issues, especially when the extender is not functioning as expected. Configuration errors, network changes, or performance issues may prompt a reset to restore the extender to its default settings. This process is akin to a clean slate, eliminating any glitches or misconfigurations that could hinder optimal performance. Essentially, resetting the Wavlink Extender is a common troubleshooting step to ensure smooth and effective wireless network extender, addressing a range of issues that might arise during usage.
Wavlink extender reset process
Here are two ways to Reset the wavlink extender. Let’s discuss.
1.Wavlink extender Hard reset process:-
To reset Wavlink Extender, follow these steps:
- Locate the reset button on the extender; it’s typically on the bottom or side.
- Use a paperclip or a similar tool to press and hold the reset button for about 10 seconds.
- Release the button when you see the LED indicators on the extender flash or blink.
- Wait for the extender to reboot, which may take a minute or two.
- After the reset, connect to the default Wi-Fi network broadcasted by the extender.
- Access the extender’s setup interface through a web browser.
- Reconfigure the extender settings as needed for optimal performance.
2 . Wavlink extender Soft reset process:-
- Connect to your Wavlink extender’s network. You can do this either by using the default SSID and password (printed on the device or user manual) or by connecting to the wired LAN port.
- Open a web browser.
- Enter the extender’s IP address in the address bar. The default IP address is usually 192.168.10.1 , but it can be different depending on your specific model. You can find the exact IP address on the device or user manual.
- Log in to the extender’s web interface. The default username and password are both usually “admin”.
- Navigate to the Management > Backup/Restore page.
- Click on the “Factory Default” button.
- Confirm the reset.
- Wait for the extender to reboot. This may take a minute or two.
- Once the extender has rebooted, you will need to reconfigure it from scratch.
Wavlink extender reset process common issues
- Lost Connection: When the extender is unable to maintain a stable connection with the main router..
- Slow Internet Speeds: Reduced data transfer rates, leading to sluggish performance.
- Configuration Errors: Incorrect settings causing connection problems.
- Device Compatibility: Difficulty connecting specific devices to the extender.
- Firmware Issues: Outdated or corrupted firmware affecting functionality.
- Limited Range Coverage: Inability to reach certain areas despite the extender’s presence.
- Network Inconsistencies: Unstable network signals causing disruptions.
- Forgotten Passwords: Inability to access extender settings due to forgotten login details.
- General Malfunctions: Random errors or malfunctions affecting overall performance.
Troubleshooting steps for Reset Wavlink Extender
- Connectivity issues: If you’re having trouble connecting to the extender’s network or to the internet, a reset can sometimes resolve the issue.
- Performance problems: If your extender is slow or unreliable, a reset can clear out any temporary data that might be causing the problem.
- Configuration errors: If you’ve made a mistake while configuring your extender, a reset can restore it to its factory default settings.
- Malware infection: If you suspect that your extender has been infected with malware, a reset can clean it out and start fresh.
ALSO READ-
Hasako wifi Extender Setup
Loom Wireless Extender Setup
Generic Wifi Extender Setup
Conclusion
By following these steps, you should be able to successfully reset Wavlink extender and get your Wi-Fi signal back into tip-top shape. Remember, a little patience and a paperclip can go a long way when it comes to conquering connectivity challenges. So, don’t hesitate to give the reset a try, and enjoy the freedom of a strong and stable Wi-Fi connection!
FAQ-