To Connect Wavlink to Router typically involves a straightforward process. Here are 10 steps to guide to Connect Wavlink to Router
1. Get the Wavlink gadget ready to Connect Wavlink to Router
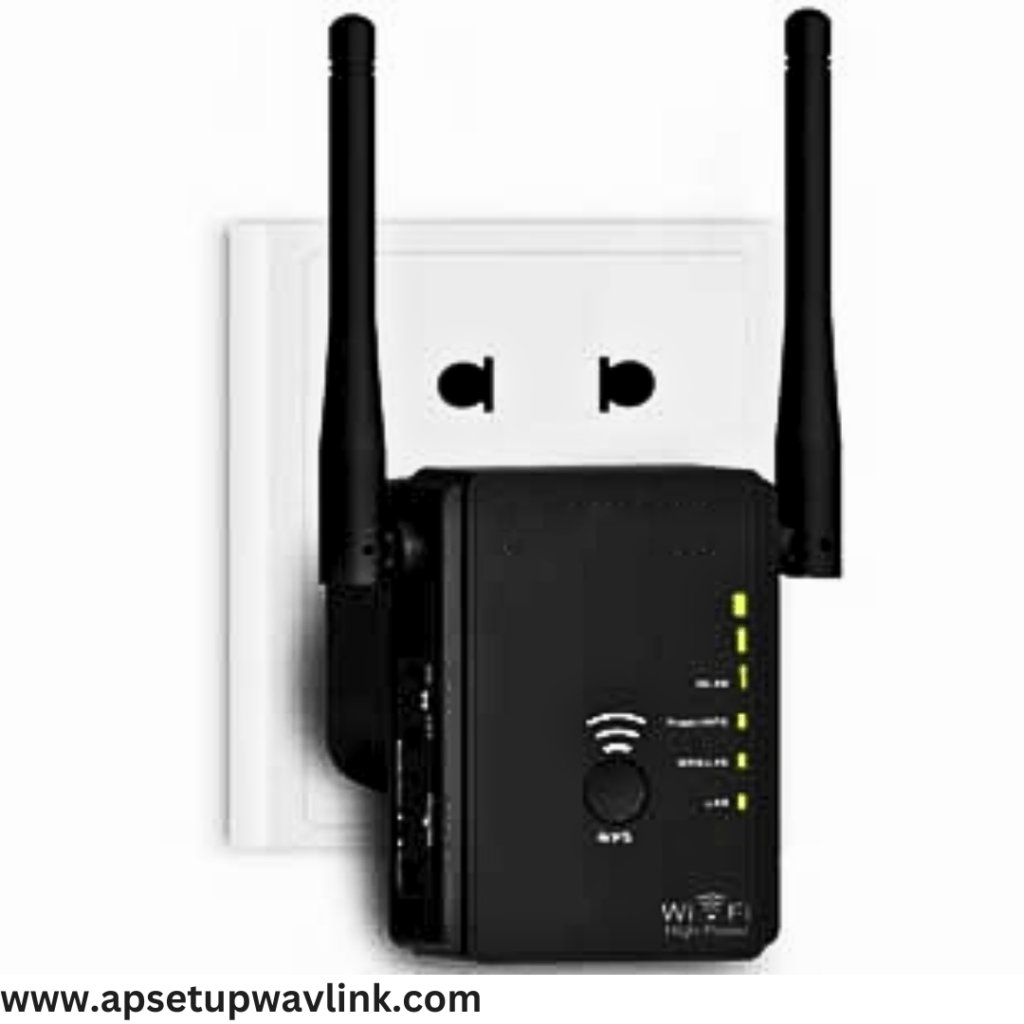
- If you are using a Wavlink extender, insert it into a power outlet in the desired location to expand the coverage of your Wi-Fi network.
- If you have a Wavlink wireless adapter or any other Wavlink device, ensure that it is in proper working condition and powered on, ready for configuration
2. Find the Wi-Fi Network by Default (Extenders Only)
- When using Wavlink WiFi extenders, wait for the device to complete its startup process.
- Once powered up, find the default WiFi network labeled “Wavlink” or a similar identifier.
- This network is utilized for the initial setup.
3. Join the Wavlink Wireless Network (Only for Extenders):
- On your computer or mobile device, access the list of available Wi-Fi networks and choose the “Wavlink” network.
- If prompted, enter the default Wi-Fi password, typically found on the device itself or in the user manual
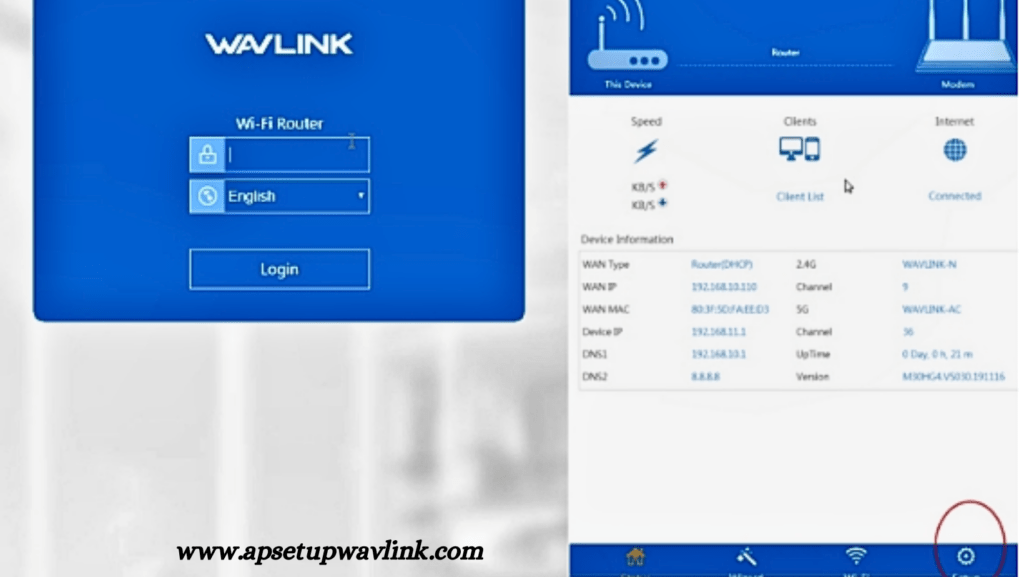
4. Go to the Interface for Web Configuration:
- Open a web browser on your connected device and enter “192.168.10.1” (or the designated IP address for your Wavlink device) in the address bar.
- Press Enter to reach the configuration page.
5. Open the Wavlink Interface and log in to Connect Wavlink to Router
- You will encounter a login prompt. Utilize the default username and password, typically set as “admin” for both, or consult the user manual to ascertain the accurate login credentials
6. Adhere to the Wizard’s setup:
- Wavlink devices frequently include a setup wizard that provides step-by-step guidance through the configuration process. Follow the instructions displayed on the screen to initiate the setup.
7. Choose Your Current Wireless Network (Just for Extenders):
- While configuring the Wavlink extender, it will scan for available Wi-Fi networks. Select your current router’s Wi-Fi network from the provided list during this setup process.
8. Type Your Password for WiFi (Only for Extenders):
- When prompted, input the password for your existing Wi-Fi network. This step is essential for the extender to establish a connection with your router and extend its signal.
9. Adjust Advanced Preferences (Optional):
- Depending on the specific Wavlink device, you might have the option to customize advanced settings, including network names (SSIDs), passwords, security settings, and more. Make adjustments to these settings according to your preferences and requirements.
10. Finish the Configuration:
After completing the configuration of the Wavlink device, carefully review your settings and confirm any changes made. The device will then save the settings and initiate a reboot.
- Connect Wavlink to Router Network (Extenders Only): Once the Wavlink extender has completed the restart process, navigate to the list of available Wi-Fi networks on your devices. Connect to the newly extended Wi-Fi network using the updated SSID and password that you configured during the setup.
That concludes the process to Connect Wavlink to Router! Your Wavlink device should now successfully Connect Wavlink to Router, either expanding your Wi-Fi coverage (if it’s an extender) or providing wireless connectivity (for a wireless adapter or a similar device).
It’s advisable to keep the firmware of your Wavlink device updated and refer to the user manual for additional configuration options and troubleshooting tips.
Recent Posts
FAQ
Q: How do I connect my Wavlink device to the router?
A: Follow the provided steps in the setup guide specific to your Wavlink device. Generally, it involves powering up the device, accessing its settings through a web browser, configuring network details, and connecting to your router.
Q: How do I find the default Wi-Fi network during setup?
A: After powering up the Wavlink device, wait for it to initialize, and then check for a Wi-Fi network named “Wavlink” or a similar identifier. This network is used for the initial configuration.
Q: Can I customize advanced settings on my Wavlink device?
A: Depending on the device model, you may have the option to configure advanced settings such as network names (SSIDs), passwords, and security settings during the setup process.
Q: Why is it important to update the Wavlink device firmware?
A: Firmware updates often include performance improvements, security patches, and bug fixes. Keeping your Wavlink device’s firmware updated ensures optimal functionality and security.