One of the newest products in the Wavlink product lineup is the Aerial HD4 Outdoor WiFi range extender. Well-known for its capacity to deliver fast internet over large outdoor spaces, it offers significant improvements in live streaming, online gaming, and video conferencing. But first, you have to start the Wavlink Aerial HD4 Outdoor Extender Setup in order to enjoy these advantages. It is imperative that you complete this necessary step in order to make the most of your high-end Wavlink device’s capabilities.
Wavlink Aerial HD4 Outdoor Extender Setup Overview
With a variety of cutting-edge features, the Wavlink Aerial HD4 Outdoor Extender is a dual-band, AC1200 capable wireless WiFi device. A wide range of features, including both sophisticated features like Power over Ethernet (PoE) and more basic ones like setup, reset, and firmware updates, should be expected by users upon purchase.
The device’s lightweight construction and striking design make it ideal for outdoor deployment, as they were designed with both portability and aesthetics in mind. Four detachable high-gain antennas, one LAN and one WAN port, seven LED status indicators, and one reset button are examples of external parts and features. In addition, the Wavlink Aerial HD4 Outdoor features built-in high-power amplifiers, a weatherproof exterior body, dual bandwidth support (2.4 GHz and 5 GHz), and WPA-PSK/WPA2-PSK encryption for wireless security.
The device has various setup options supplied by the manufacturer in addition to its hardware features. With professional assistance, users can effortlessly carry out these setup steps, guaranteeing a seamless and effective Wavlink Aerial HD4 Outdoor Extender configuration process.
Deployment/ Installation Process of the Device
Since Wavlink HD4 Aerial Outdoor Extender is chiefly an outdoor networking device, users usually find it difficult to deploy and fix it. However, there is nothing difficult about the deployment process.
- First, take out your Wavlink Outdoor Extender device from the kit.
- Attach the antenna to the device by following the instructions given in the manual.
- Once done, identify the ideal space for the installation of the device. You will need a fixed pole or something which can be used to attach the device.
- Attach the holder to the device after determining the best location and item for the installation. The holder is located within your Wavlink kit.
- Now, take a cable tie that will also be inside your Wavlink outdoor extender kit and then use it to tie the device to a fixed object.
Also Read: Wavlink WL-WN575a3 Aerial D4 AC1200 Setup
Wavlink Aerial HD4 Outdoor Extender Setup Via Web UI
The Wavlink Aerial HD4 Outdoor Extender Setup process isn’t much different from other Wavlink models. But, there is no need to worry as we have outlined the setup steps below for you. Before you start the configuration, ensure that everything which is required for the setup is in place.
- The first step is to connect your Wavlink device and modem after you’ve confirmed.
- Use the PoE port to accomplish the same thing.
- Second, position the extender gadget in the most advantageous location. Your modem and the location where you wish to browse the internet should be close to one another.
- At this point, you should plug in and turn on the Wavlink device.
- Use an internet-connected device to sign up for the Wavlink network.
- Open a web browser and navigate to the Wavlink Aerial HD4 outdoor extender setup portal or 198.162.10.1
- Log in to your Wavlink account or create one if you don’t already have one.
- Answer the security question if prompted.
- After logging in, find the Wavlink network that you want to configure.
- From the options for the repeater, extender, or router, choose a mode.
- Follow the extra Wavlink Aerial HD4 outdoor extender setup instructions to complete the procedure.
- After the setup is complete, restart the device for optimal performance.
Different Modes of Wavlink Aerial HD4 Outdoor Extender Setup
The Wavlink Aerial HD4 is an all-in-one outdoor WiFi range extender. Depending on your networking needs, you can set it up as an access point, router, or extender. Additionally, the device has the option to be configured in WISP mode. Let’s explore these modes and when they work best for you
Router Mode
The most fundamental mode is router mode. Your Wavlink Aerial HD4 Outdoor WiFi extender functions exactly like a router when set up in router mode. Your modem sends the signal to it, which it then broadcasts everywhere you desire. This mode can be engaged when you require internet access in a restricted area. And all you have to do to turn this mode on is choose the “router mode” during setup.
Repeater Mode
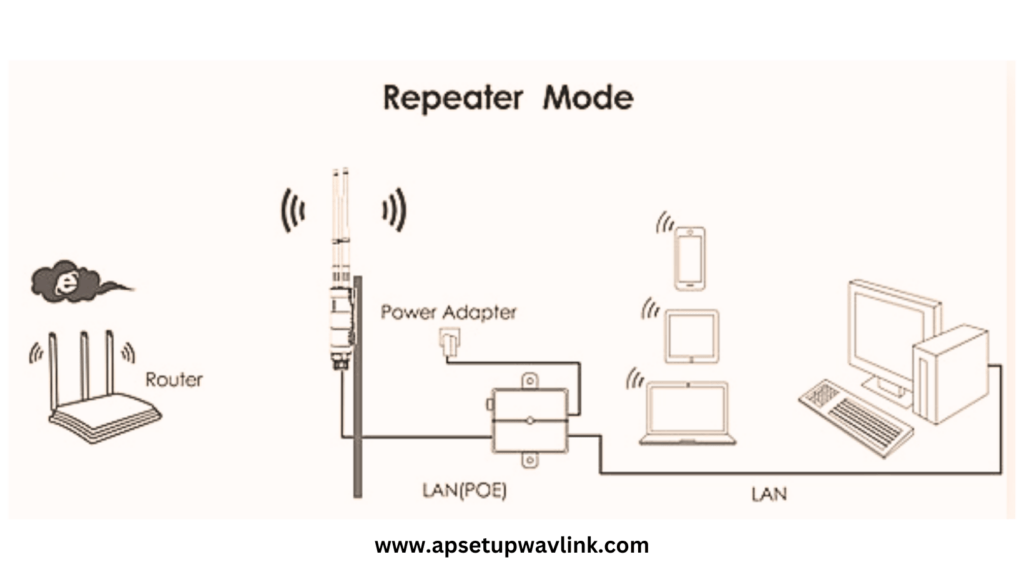
Your Wavlink outdoor extender device can function as a repeater when it is in repeater mode. This implies that it will rebroadcast the signals to a wider area after receiving them from your modem or router. You can eliminate WiFi dead zones and spots with spotty coverage at your house or outside by using this mode. You must select the “Repeater Setup” option during the Wavlink Aerial HD4 Outdoor Extender setup in order to enable this mode.
AP/ Access Point Mode
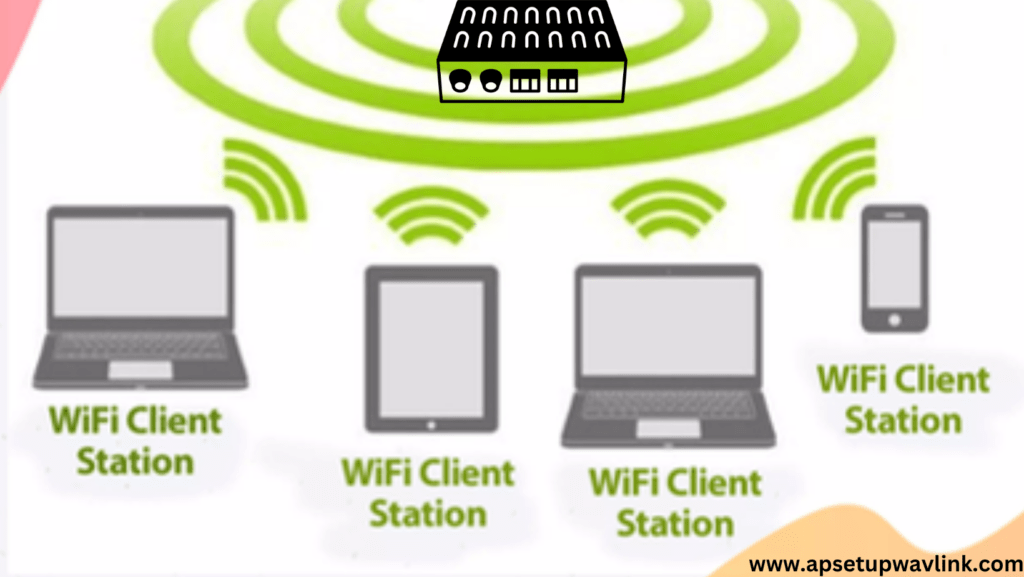
The Wavlink Arial HD4 Outdoor device serves as a central hub for numerous connected devices when it is configured in access point mode. It gives every connected device a unique IP address, facilitating wireless communication and data sharing between the devices. Particularly in two-, three-, or even four-story buildings, it is advantageous. The device must first be placed where you need the network reach in order to activate this mode. After that, choose the “Access Point or AP Mode” to configure the device.
WISP Mode
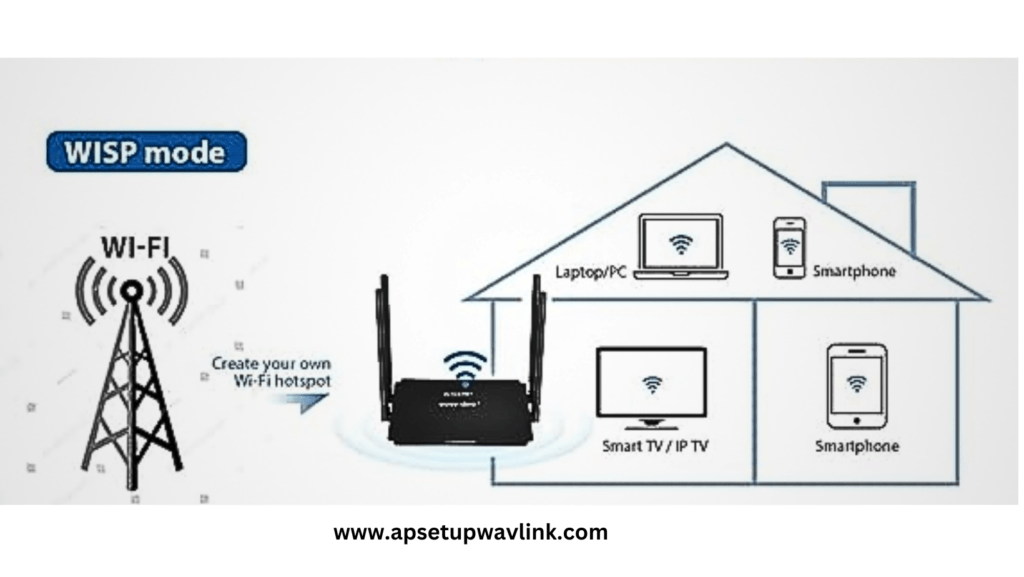
When your Wavlink outdoor extender device is in WISP mode, it broadcasts signals to other devices connected to it after receiving them from other distant WiFi hotspots. To fully utilize this unique feature, you can activate this mode if the internet signals from your primary modem or router are insufficient. There is nothing special you need to do in order to activate this mode. It’s as easy as choosing the WISP mode for the Wavlink Aerial HD4 Outdoor Extender Setup.
Troubleshooting the Wavlink Arial HD4 Outdoor Extender Setup Error
It has been observed that many users frequently experience various kinds of errors when doing Wavlink Aerial HD4 Outdoor Extender Setup. The same might happen to you. This is a result of the gadget’s intricate technical design. The good news is that, with a few easy troubleshooting steps, you can easily fix those errors. Discover those by reading on:
- Verify that your modem or router is connected to the internet steadily.
- Give your Wavlink outdoor extender device a restart.
- Check to see if the devices’ placement needs to be adjusted.
- If there is one available, update the firmware on your Wavlink device or modem.
- Return the Wavlink Arial HD4 Outdoor Extender gadget to its original factory configurations.
- Verify the Wavlink login information to make sure it is accurate.
- To reach the Wavlink login & setup page, switch to a different device or web browser.
- Use the Wavlink Router app to configure.
- Replace the modem or router that you currently have.
- Turn off the baby monitor and any other devices that cause radio interference.
FAQ